How to grow blackcurrants in the UK is one of those topics that deserves far more attention than it gets. How to grow blackcurrants in the UK is, if anything, a question that answers itself once you’ve planted your first bush — because blackcurrants are among the most forgiving, productive, and frankly underrated fruits you can grow in a British garden. One established bush can give you several kilograms of fruit every summer, and unlike many soft fruits, it takes almost no cosseting to get there.
Blackcurrants have a long history in the British kitchen garden. They’re native to northern Europe and practically built for our climate — cool winters, reliable rainfall, and summers that don’t get too scorching. If you’ve been hesitating because you thought fruit-growing was complicated, blackcurrants are the place to start.
Why Blackcurrants Are Perfect for UK Gardeners
Few fruits are as naturally suited to the UK as blackcurrants. They’re hardy down to well below freezing, they tolerate heavy clay soils that would kill off more delicate crops, and they don’t need a pollination partner — a single bush will fruit perfectly well on its own.
They’re also genuinely productive. A mature blackcurrant bush, perhaps three or four years old, can yield anywhere from 4 to 10kg of fruit in a good season. That’s a lot of jam, cordial, crumble topping, and ice cream sauce from a plant that takes up perhaps a square metre of space. Compare that to the effort involved in getting a fig or a peach to produce anything worthwhile in a British summer and you’ll understand why generations of allotment gardeners have kept a blackcurrant bush tucked in the corner.
There’s also a nutritional case to be made. Blackcurrants are extraordinarily rich in vitamin C — ounce for ounce, significantly more than oranges — as well as antioxidants and vitamin K. The sharp, intense flavour makes them a little unpleasant to eat raw for most people, but cooked with a little sugar they’re magnificent.
When to Plant Blackcurrants in the UK
Bare-root blackcurrant bushes are available from autumn through to early spring — typically October to March — and this is the best time to plant them. Bare-root plants are cheaper than container-grown ones, establish quickly, and are available from reputable mail-order fruit nurseries such as Blackmoor Nurseries in Hampshire or Ken Muir in Essex.
Container-grown plants can be planted at any time of year, though avoid planting in frozen ground or in the height of summer when young roots may struggle to establish in dry conditions.
The RHS recommends planting blackcurrants about 5cm deeper than they were previously growing, which encourages the bush to produce more shoots from below ground. This is slightly counterintuitive if you’re used to planting at soil level, but it’s important — it creates a multi-stemmed, productive bush rather than a leggy, single-stemmed one.
📖 Also read: Growing Raspberries in the UK
Choosing the Right Variety
The variety you choose matters more than people realise. There’s a huge range of blackcurrant cultivars available in the UK, and they differ in ripening time, flavour, vigour, and disease resistance.
Ben Connan is probably the best all-rounder for a small garden. It’s compact, very heavy-cropping, and the large berries are sweet enough to eat fresh — which most blackcurrants aren’t. It’s also resistant to mildew, which is a common problem in warmer, drier spots.
Ben Hope is the variety of choice if you’re in the north of England or Scotland, or anywhere that gets late frosts. It flowers later than most, which means the blossoms are less likely to be caught by a cold snap in April. It also has excellent resistance to gall mite, the most troublesome blackcurrant pest.
Ben Lomond is a classic — upright, vigorous, and one of the most widely planted blackcurrants in the UK for decades. It produces medium to large berries with a rich, sharp flavour and is well suited to making cordial and jam.
Ebony is worth mentioning as an early ripener — its fruit is ready by late June or early July, ahead of most other varieties. If you want to spread your harvest or beat the birds to the crop, mixing Ebony with a later variety like Ben Hope works well.
Soil and Site
Blackcurrants are more adaptable than most fruit, but they do have preferences. They crop best in full sun but will tolerate partial shade — a north-facing wall won’t work, but a spot that gets five or six hours of sun a day is perfectly acceptable.
Soil should ideally be fertile and moisture-retentive. Blackcurrants are thirsty plants and don’t thrive in thin, sandy soils without a lot of added organic matter. Before planting, dig in a generous bucketful of well-rotted manure or homemade compost per plant. If your soil is heavy clay, this also helps improve drainage — waterlogged roots will rot.
Avoid frost pockets if you can. Blackcurrants flower in early spring, and the blossoms are vulnerable to a late frost. A site with good air drainage — slightly elevated, or with a wall or hedge to the north — reduces the risk.
How to Plant Blackcurrants
Dig a hole wide enough to spread the roots comfortably and plant the bush about 5cm lower than the soil mark on the stem. This encourages new shoots to emerge from below ground, creating that multi-stemmed framework that’s the foundation of a productive bush.
After planting, cut all the shoots back to two or three buds above ground. This seems drastic — you’ve just bought a plant and now you’re cutting most of it off — but it’s the right thing to do. It sacrifices the first season’s fruit in favour of building a strong root system and generating more basal shoots, which is what you actually want from a long-term fruiting bush. Bushes planted and not pruned in this way often become unproductive within a few years.
Space bushes around 1.5 metres apart. Closer than this and air circulation suffers, which encourages mildew.
📖 Also read: Growing Blueberries in Pots UK
Caring for Blackcurrants Through the Year
Feeding: Blackcurrants are hungry plants. In late winter or early spring, apply a general balanced fertiliser — Growmore or fish, blood and bone both work well — at about 35g per square metre. Then, as the fruit begins to form in early summer, give the plant a liquid feed high in potassium (a tomato fertiliser does the job) every couple of weeks until harvest. This makes a genuine difference to fruit size and sweetness.
Watering: Young plants need regular watering in their first season. Established bushes are more drought-tolerant but will still benefit from a deep soak during dry spells in May and June when the fruit is swelling. A thick mulch of compost or bark chippings around the base — kept away from the stems themselves — helps retain moisture considerably.
Mulching: Apply a 7–10cm layer of mulch in spring, after the soil has warmed. This suppresses weeds, locks in moisture, and slowly feeds the soil as it breaks down. Mushroom compost, well-rotted manure, or leafmould are all excellent choices.
Netting: Birds adore blackcurrants. If you don’t protect the ripening crop you will lose it, usually a day or two before you intended to pick it. A fruit cage is the neatest solution if you’re growing several bushes. For a single bush, a simple frame of canes and netting does the job — make sure it’s secured at the base so blackbirds can’t sneak underneath.
Pruning Blackcurrants
Blackcurrants fruit best on wood that grew the previous year. This is the key fact that shapes how you prune them.
After harvest — typically in August or September — remove a quarter to a third of the oldest, darkest stems right back to ground level. These are the ones that have already fruited and won’t be as productive again. Young, pale green or reddish stems that grew Young, pale green or reddish stems that grew this season are your most valuable wood — they’ll carry next year’s crop. Leave these completely alone.
After a few years of this rotation, you’ll have a bush that’s constantly renewing itself from the base. The aim is to keep around eight to twelve stems of mixed ages at any one time. It sounds complex when written down, but in practice it quickly becomes intuitive — dark, gnarled old wood out; young, supple new wood in.
In the first winter after planting (remembering you’ve already cut everything back hard at planting time), simply remove any dead, damaged, or crossing stems. From the second winter onwards, begin the regular renewal pruning described above.
Common Pests and Problems
Big bud mite (blackcurrant gall mite) is the most serious pest blackcurrant growers face in the UK. The mite invades buds during the growing season, causing them to swell into round, swollen shapes that look noticeably different from healthy, pointed buds. Affected buds produce little or no growth. The mite also transmits reversion virus, which is incurable and eventually renders a bush unproductive.
There’s no chemical control available to home gardeners. The best approach is prevention: buy certified virus-free stock from a reputable nursery, choose resistant varieties like Ben Hope, and remove and burn any badly affected stems. If a whole bush is heavily infested and showing signs of reversion (distorted, pale leaves with fewer lobes than normal), dig it up and destroy it rather than spreading the problem.
Powdery mildew is a fungal problem that shows up as a white powdery coating on young leaves and shoot tips, usually in late spring or summer. It’s more common in dry conditions or where air circulation is poor. The solution is primarily preventative: don’t crowd bushes, keep them well-watered during dry spells, and choose mildew-resistant varieties. If mildew does take hold, removing affected growth helps limit spread.
Aphids occasionally colonise the growing tips of blackcurrants, causing leaves to pucker and distort. A sharp jet of water dislodges them, or you can wait for natural predators — blue tits and ladybirds are both fond of aphid colonies and will usually deal with the problem without any intervention from you.
Birds are less of a pest and more of a certainty. Net the ripening crop or accept that you’re sharing.
Harvesting and Using Blackcurrants
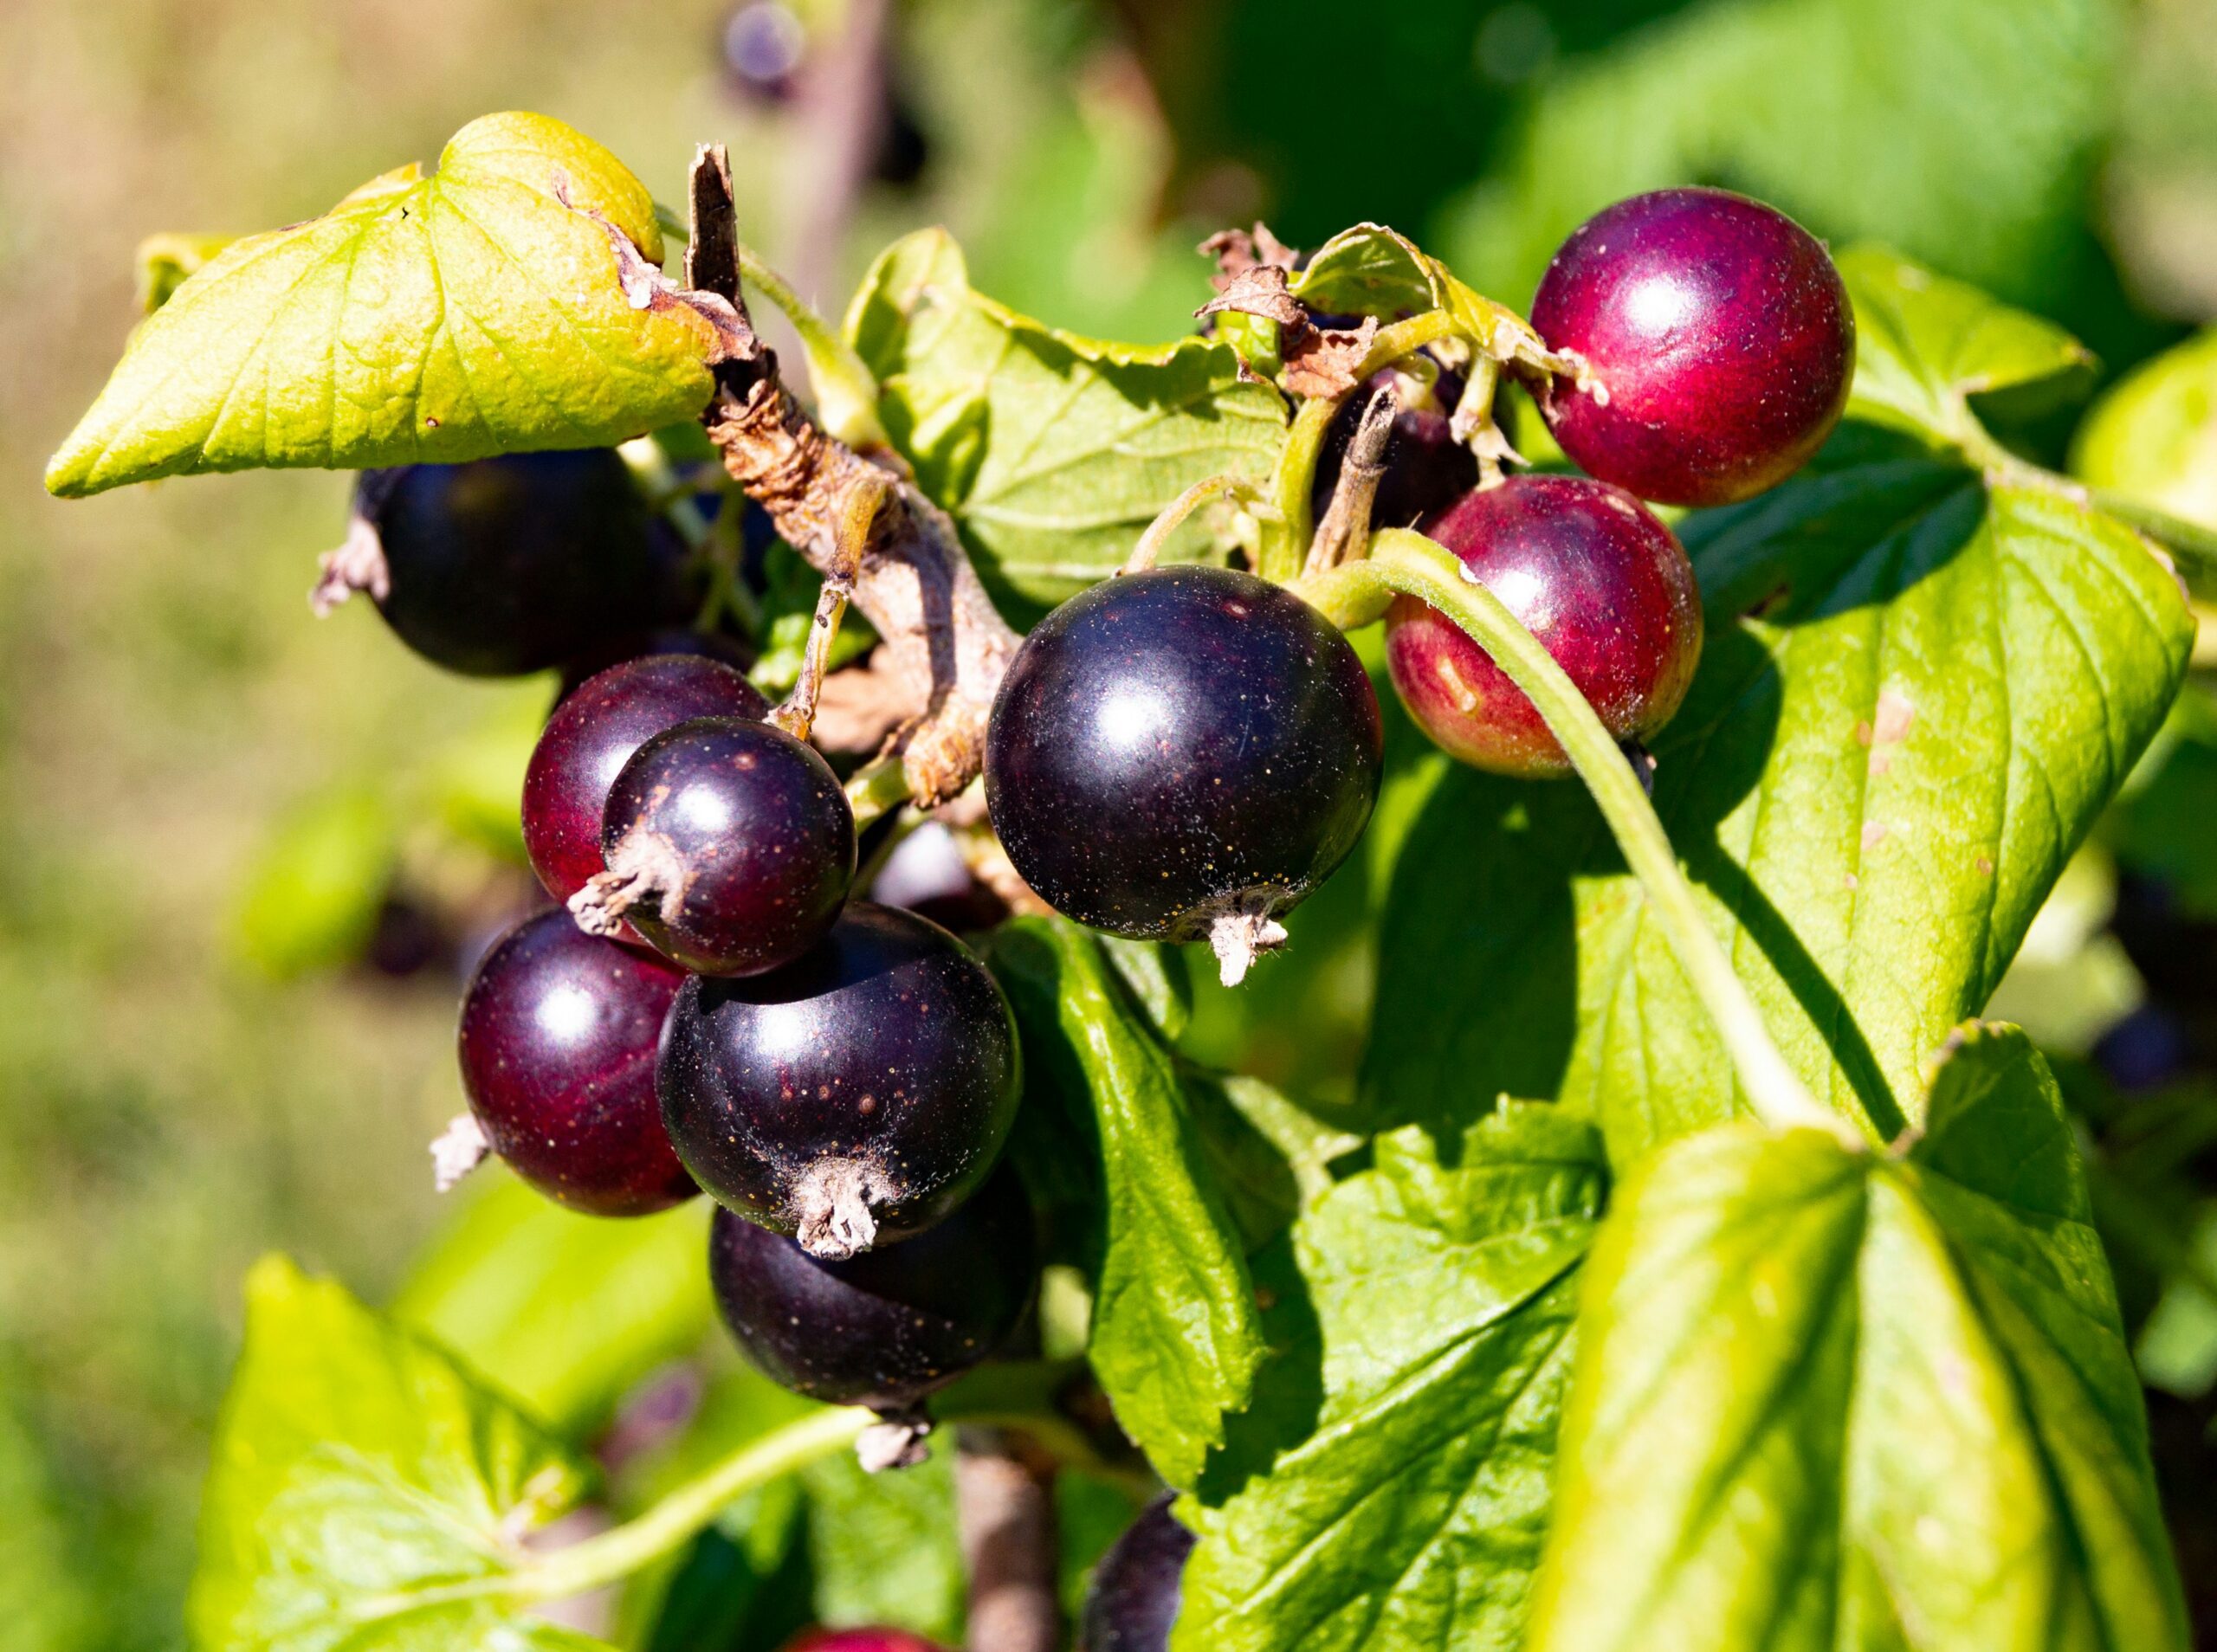
Blackcurrants ripen in July and August, depending on variety and location. Unlike strawberries, which ripen individually and need picking every day or two, blackcurrants ripen in clusters and can generally be harvested all at once when the whole bunch has turned deep purple-black.
The easiest way to harvest is to pick entire strings (“stigs”) of berries rather than individual fruits. Strip them into a large bowl and then sort out any unripe ones afterwards. Wear dark clothing — blackcurrant juice stains are stubborn.
Fresh blackcurrants don’t keep long in the fridge — two or three days at most. But they freeze beautifully. Spread them in a single layer on a baking tray, freeze until solid, then transfer to bags. They’ll keep for up to a year and can be used straight from frozen in jams, cordials, and crumbles.
Blackcurrant cordial made at home is in a different league from anything you’ll buy in a shop. A simple recipe — simmered berries, sugar, and a little water — fills the kitchen with a smell that’s hard to describe and easy to get addicted to.
📖 Also read: How to Make Compost in the UK
Is It Worth Growing Blackcurrants?
Without question. A single bush costs around £8–£15 from a good nursery, takes two to three years to reach full productivity, and then fruits reliably for fifteen to twenty years with nothing more than an annual prune, a feed in spring, and some netting at harvest time. The return on that investment — in fruit, in flavour, and in the quiet satisfaction of growing something genuinely productive — is extraordinary.
If you have space for one fruit bush in your garden, blackcurrants make a very strong case for themselves. They’re tough, generous, and suited to the British climate in a way that peaches, apricots, and figs simply aren’t. Grow them in Leeds or Llandrindod Wells, in a clay-heavy allotment or a sheltered suburban garden, and they’ll reward you year after year.
Leave a Reply