Few plants do more for a garden with less effort than the hollyhock. To grow hollyhocks in the UK is to invite something genuinely old-fashioned and magnificent into your borders — those towering spires of silky flowers in shades of burgundy, blush, white, yellow and near-black that have been brightening cottage gardens and farmyard walls for centuries. They ask for little beyond a sunny spot and reasonable drainage, they self-seed with cheerful enthusiasm, and once established they return year after year with barely a thought from you. If you’ve been meaning to try them and somehow haven’t got around to it yet, this is the year.
Hollyhocks (Alcea rosea) are technically short-lived perennials, though most gardeners treat them as biennials — sowing one year to flower the next. The good news is that they self-seed so readily that, once you have them in the garden, you rarely need to sow again. A single established plant can produce dozens of seedlings in the surrounding soil, giving you a self-renewing colony that asks nothing more than the occasional edit to keep it where you want it.
📖 Also read: How to Create a Cottage Garden — The Quintessentially British Style for Any Size Space
Where to Grow Hollyhocks in the UK — Position and Soil
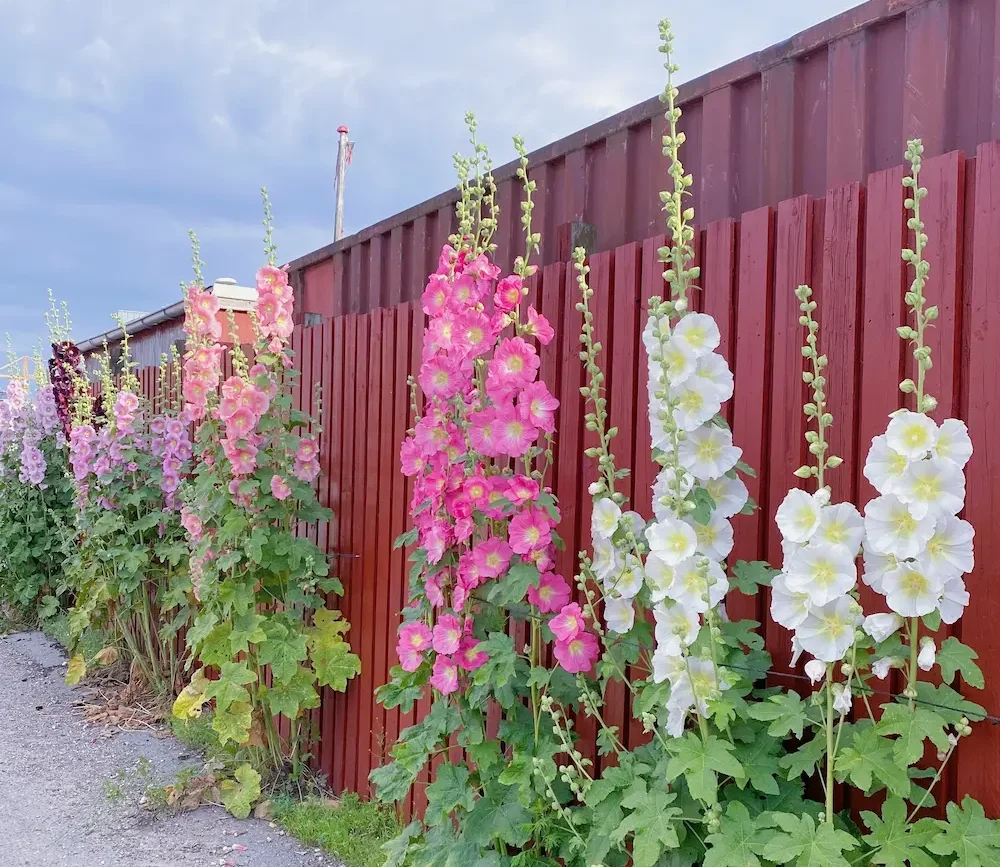
Hollyhocks are sun-lovers and the more direct light they receive, the taller and more floriferous they become. A south-facing wall or fence is the classic position — and not just for aesthetic reasons. The reflected warmth from masonry encourages faster growth, the wall provides natural support against wind, and the drainage at the base of most walls tends to be free enough to keep the roots happy. You’ll see hollyhocks growing this way all over the villages of the Cotswolds and across the south of England, their stems towering over garden walls in high summer in a way that looks entirely effortless.
That said, hollyhocks will grow in any reasonably fertile, free-draining soil in full sun, and they’re perfectly happy in a standard sunny border as long as they’re positioned at the back where their height — typically 1.5 to 2.5 metres — doesn’t overshadow everything else. What they dislike most is waterlogged soil, particularly over winter. Heavy clay that sits wet is the single most reliable way to lose hollyhocks over winter; if that’s what you have, improving drainage with grit before planting or growing in a raised bed makes an enormous difference. According to the RHS hollyhock growing guide, fertile, well-drained soil in full sun produces the tallest flower spikes — which, if you’re growing hollyhocks, is surely the whole point.
How to Grow Hollyhocks in the UK from Seed
Growing hollyhocks from seed is satisfying, economical and gives you access to a far wider range of colours and flower forms than buying plants. The standard approach is to sow indoors in April or May, in modules or small pots of peat-free seed compost, at a temperature of around 18–20°C. Germination is quick and reliable — you should see seedlings within a fortnight. Once they have a couple of true leaves, pot them on individually into 9cm pots and grow them on somewhere bright until they’re sturdy enough to plant out.
Alternatively, sow directly into the ground in May or June where you want the plants to flower — hollyhock seeds are large enough to handle easily and direct-sown plants often establish with impressive vigour, putting down a deep taproot that supports strong growth. Either way, plants sown in spring will not flower in their first year; they spend the first season building a substantial root system and basal rosette of leaves, then send up their flower spikes in their second summer. This is the biennial pattern, and it’s worth understanding before you start so you’re not waiting anxiously for flowers that simply aren’t coming yet.
One further option worth knowing: hollyhock seed sown in August or September and overwintered as small plants in a cold frame or unheated greenhouse will flower the following summer — effectively giving you a one-year turnaround rather than two. This is the method used by gardeners who want to fill a gap quickly or establish a display in a new garden without waiting.
📖 Also read: How to Grow Sweet Peas in the UK — The Most Scented Climber in the Garden
The Best Hollyhock Varieties to Grow in the UK
The range of hollyhock varieties available to UK gardeners has expanded considerably, and the choice between single and double flowers is the most important decision to make. Single-flowered hollyhocks — where each bloom has one layer of petals around a prominent central boss — are the most beautiful for wildlife, attracting bumblebees and butterflies in impressive numbers through mid to late summer. The classic single-flowered mixed strains like ‘Chater’s Mixed’ and ‘Halo’ series produce the full range of hollyhock colours on tall, stately stems that look exactly as cottage gardens should look.
Double-flowered hollyhocks are more showy and frilly, resembling enormous pom-poms or old-fashioned peony blooms stacked up a tall stem. They’re undeniably dramatic and very popular for cutting and cottage garden displays, but they’re less useful for bees and butterflies than single types. ‘Chater’s Double’ is the best-known strain and comes in a reliable range of colours. For something genuinely unusual, ‘Nigra’ — sometimes sold as ‘Black Hollyhock’ — produces deeply saturated maroon-black single flowers that look extraordinary against pale stone walls or planted alongside silver-leaved plants. It’s available from most specialist seed merchants and is one of those varieties that consistently draws comments from garden visitors.
📖 Also read: How to Create a Garden That Attracts Butterflies — Plants, Layout, and What Not to Do
Staking, Feeding and Ongoing Care
Hollyhocks are largely self-sufficient once established, but a few simple tasks make the difference between plants that perform well and plants that flop, rust and disappoint. Staking is the most important of these, particularly in gardens with any exposure to wind. A tall hollyhock in full flower can reach 2.5 metres or more and acts as an effective sail in anything above a light breeze — without support, the stems snap cleanly at the base, often taking a plant that was weeks away from its best display with them. Insert a bamboo cane close to each stem in late spring as the plants begin to put on height, and tie in loosely but regularly as the stem extends. One cane per stem is usually sufficient for single-stemmed varieties; branching types may need two or three.
Feeding is rarely necessary in a well-prepared border soil, but a mulch of garden compost around the base of plants in spring serves the dual purpose of suppressing weeds and slowly releasing nutrients as it breaks down. In very free-draining sandy soils, a liquid high-potassium feed in early summer can help support flower production. Watering should be consistent through the first growing season — young plants need regular moisture to establish their taproots — but mature hollyhocks in a border require water only during prolonged dry spells.
Hollyhock Rust — The One Problem Worth Taking Seriously
If there’s one thing that stops gardeners growing hollyhocks, it’s rust disease — and understandably so. Hollyhock rust (Phragmidium alceae) is a fungal disease that produces conspicuous orange-yellow pustules on the undersides of leaves and corresponding yellow spots on the upper surface, typically appearing in mid to late summer. In a bad year it can defoliate a plant from the bottom up, leaving bare lower stems topped with a tuft of leaves and flowers that looks tatty and diseased even when flowering continues normally above.
The pragmatic approach — and the one most experienced hollyhock growers take — is to accept that rust is part of growing hollyhocks rather than a disaster to be prevented at all costs. Remove affected lower leaves as soon as you spot them to slow the spread, clear away all dead and diseased foliage at the end of the season to reduce the overwintering spore load, and replace badly affected plants after three or four years rather than persisting with a diseased specimen. Because hollyhocks self-seed so readily, you almost always have young plants coming through to replace old ones anyway, and young plants tend to show less rust than older, more established ones. Good air circulation around plants — achieved by not cramming them too tightly together — also reduces how quickly rust takes hold in the first place.
📖 Also read: How to Get Rid of Aphids Naturally — The UK Gardener’s Guide to Beating Pests Without Chemicals
Letting Hollyhocks Self-Seed — The Easiest Way to Keep Them Going
The most relaxed and rewarding approach to growing hollyhocks in the UK long-term is to let them self-seed and simply manage where the seedlings appear. After flowering, leave a few spent flower spikes on the plant until the seed cases turn brown and papery. The seeds are large, flat and easy to collect if you want to save specific colours; otherwise, simply leave the spikes to shed naturally and seedlings will appear around the parent plant the following spring.
Young hollyhock seedlings are easy to recognise — they have large, rounded, softly downy leaves and appear in clusters at the base of where the parent plant grew. Thin them to the strongest, transplant any that have come up in the wrong place while they’re still small (hollyhocks develop deep taproots that make transplanting difficult once the plants are more than a few centimetres tall), and protect them from slugs with a ring of grit or a few pellets in early spring. Within two seasons of your first sowing, you’ll have a self-sustaining colony of hollyhocks that requires no seed buying, no propagation, and very little effort beyond the annual edit — which is precisely the kind of gardening most of us aspire to.
📖 Also read: How to Grow Cosmos — The Easiest Annual Flower for a UK Cutting Garden
Leave a Reply